
 English
 русский
 日本語
日本語 عربى
عربى Español
Content
- 1 What "Under Faucet" Actually Means — and Why It Matters
- 2 Types of Under Faucet Filtration Systems Available Today
- 3 Contaminants Removed by Under Faucet Filters — A Realistic Look
- 4 How to Install an Under Faucet Filter System Step by Step
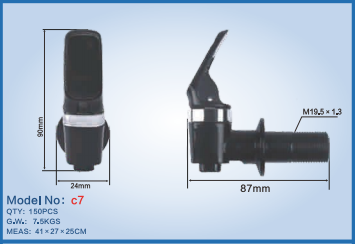
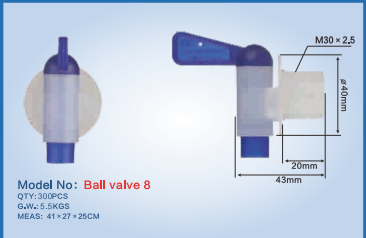
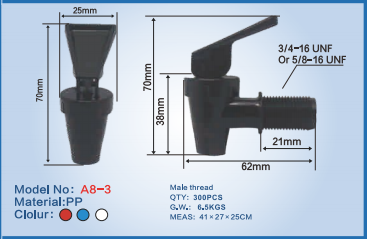
- 5 Choosing the Right Spigot for Your Under Faucet System
- 6 Maintenance Schedule and Filter Replacement — What Actually Needs Doing
- 7 Under Faucet Filters vs. Other Filtration Options — A Direct Comparison
- 8 Common Problems with Under Faucet Systems and How to Fix Them
- 9 Under Faucet Filters for Renters — What's Actually Possible
- 10 Water Waste in RO Systems — The Honest Numbers
- 11 Key Questions to Ask Before Buying an Under Faucet System
What "Under Faucet" Actually Means — and Why It Matters
An under faucet water filter is a filtration system installed beneath the sink, directly connected to the cold-water supply line that feeds your spigot. Unlike pitcher filters or countertop units, these systems work invisibly — the water passes through one or more filter cartridges before it ever reaches the spigot outlet. The result is filtered water on demand, with no waiting, no refilling, and no bulky equipment sitting on your counter.
The core advantage is simple: filtered water flows directly from your existing faucet or a dedicated filtered spigot every time you turn the handle. This setup is practical for households that want cleaner drinking water without changing their daily habits. You don't think about it — you just use the tap.
There are two main configurations. The first routes filtered water through your existing spigot, which means all cold water from that faucet is filtered. The second — and more common for serious filtration — adds a dedicated dispensing spigot mounted next to or through the sink, used exclusively for drinking and cooking water. Both are legitimate approaches, and the right choice depends on your water quality, budget, and how you use your kitchen sink.
Types of Under Faucet Filtration Systems Available Today
The under faucet category covers several distinct technologies. Understanding the differences helps you match the right system to your actual water problems rather than buying based on marketing language alone.
Single-Stage Carbon Block Filters
These are the most affordable under faucet systems, typically costing between $30 and $80 for the unit, with replacement cartridges running $15–$40 every six months. A single carbon block cartridge reduces chlorine, chloramines, sediment, and many volatile organic compounds (VOCs). Flow rate is generally high — often 0.5 to 1.0 gallon per minute — because there's no membrane to slow things down. If your municipal water tastes fine but has an occasional chlorine smell, a single-stage carbon filter under the faucet is often all you need.
Multi-Stage Inline Systems
Multi-stage under faucet systems stack two to five filter cartridges in sequence. A typical three-stage setup might include a sediment pre-filter, an activated carbon block, and a post-filter for polishing. Each stage targets specific contaminants, and the combination can handle a much wider range of water quality issues. Brands like Watts, Culligan, and Aquasana offer three-stage under faucet systems in the $80–$200 range. These work well under any standard kitchen spigot and are particularly useful in areas with moderate water hardness or traces of industrial runoff.
Reverse Osmosis (RO) Under Sink Systems
Reverse osmosis systems are the most thorough under faucet option. They push water through a semi-permeable membrane capable of rejecting dissolved solids, heavy metals including lead and arsenic, nitrates, fluoride, and many pharmaceuticals. A well-maintained RO system can reduce total dissolved solids (TDS) by 90–99%. The tradeoff is flow rate — RO systems fill a small pressurized storage tank rather than filtering on demand, which is why they always come with a dedicated dispensing spigot rather than routing through the main kitchen faucet. Installation requires drilling a hole for that extra spigot, connecting to the drain line for waste water discharge, and tapping into the cold supply. Units from brands like APEC, iSpring, and Express Water range from $150 to $500 installed.
Ultrafiltration (UF) Systems
Ultrafiltration is a membrane-based technology similar to RO but with larger pores — typically 0.01 to 0.1 microns. UF removes bacteria, cysts, viruses, and most particulates without removing beneficial minerals or requiring a drain connection. Unlike RO, UF systems deliver filtered water directly through the spigot without a storage tank. Flow rates are faster than RO, and there's no wastewater. The limitation is that UF doesn't remove dissolved chemicals or heavy metals at the same rate as RO. For households on well water with microbial concerns, UF under faucet systems are a strong option.
Contaminants Removed by Under Faucet Filters — A Realistic Look
One of the most common mistakes people make is assuming that any under faucet filter will remove any contaminant. That's not how it works. Each filter type has a specific removal profile, and matching that profile to your actual water test results is the only reliable way to know whether a system is earning its place under your sink.
| Contaminant | Carbon Block | Multi-Stage | Reverse Osmosis | Ultrafiltration |
|---|---|---|---|---|
| Chlorine & Chloramines | Yes | Yes | Yes | Partial |
| Lead | Partial | Yes | Yes | No |
| Nitrates | No | Partial | Yes | No |
| Bacteria & Cysts | No | Partial | Yes | Yes |
| Fluoride | No | No | Yes | No |
| VOCs | Yes | Yes | Yes | No |
| Dissolved Solids (TDS) | No | No | Yes | No |
Before purchasing any under faucet system, get your water tested. Many municipal water utilities publish annual water quality reports (Consumer Confidence Reports) that list detected contaminants and their levels. Private well owners should test independently — an accredited lab test covering bacteria, nitrates, pH, hardness, and metals typically costs $100–$300 and gives you a solid foundation for choosing the right system.
How to Install an Under Faucet Filter System Step by Step
Most under faucet systems are designed for DIY installation. A standard single or multi-stage system requires no special tools beyond an adjustable wrench and a drill (if adding a dedicated spigot). RO systems take slightly more time, but the process is still manageable for anyone comfortable with basic plumbing. Here's how a typical installation works.
Step 1 — Shut Off the Cold Water Supply
Locate the cold water shut-off valve under the sink. Turn it clockwise until it stops. Open the spigot above to release pressure and drain remaining water from the line. This takes about 30 seconds and prevents any surprise sprays while you're working with the supply line.
Step 2 — Install the Feed Water Adapter
Most under faucet systems come with a saddle valve or a T-fitting that taps into the cold supply line. The T-fitting approach is more reliable — it requires disconnecting the supply line from the shut-off valve, threading in the T-adapter, then reconnecting the line to the sink and adding a new line to the filter. Saddle valves are easier to install but are more prone to leaks over time and are banned by plumbing codes in some jurisdictions. Check your local codes before choosing.
Step 3 — Mount the Filter Housing
Most under faucet filter housings mount to the cabinet wall or base using screws and brackets included in the kit. Choose a position that leaves enough clearance to remove and replace cartridges — typically you need 4–6 inches below the housing for a standard 10-inch cartridge. Avoid mounting directly against the cabinet back if your cartridges require a housing wrench for removal.
Step 4 — Install the Dedicated Spigot (If Required)
RO systems and some multi-stage systems use a separate filtered water spigot. Most modern sinks have a pre-drilled knockout hole for a soap dispenser or sprayer — this knockout hole is often the perfect location for the filtered water spigot, saving you from drilling through stainless steel or porcelain. If no knockout hole exists, you'll need a hole saw appropriate for your sink material. Stainless steel requires a bi-metal hole saw; cast iron or porcelain sinks require diamond-tipped tools and patience.
Step 5 — Connect Tubing and Check for Leaks
Use the supplied tubing to connect the feed water adapter to the filter inlet, and the filter outlet to the spigot (or to the next stage in a multi-stage system). Push-to-connect fittings — the standard in most modern kits — simply require pushing the tube firmly into the fitting until it seats. Turn the water back on slowly and check every connection point. Let the system run for 5–10 minutes to flush the new cartridges before drinking the filtered water.
Choosing the Right Spigot for Your Under Faucet System
The spigot — the visible dispensing point of your filtration system — often gets less attention than the filter housing, but it deserves consideration. If you're adding a dedicated filtered water spigot next to your main faucet, you'll want something that looks intentional rather than tacked on.
Most RO and multi-stage systems ship with a basic air-gap or non-air-gap spigot in chrome. These functional but plain spigots do the job, but they can look out of place on high-end sinks. Many manufacturers now offer upgrade spigots in brushed nickel, matte black, oil-rubbed bronze, and polished brass. Matching your filtered water spigot to your main faucet finish creates a cleaner look. Expect to spend $20–$80 for a finish-matched spigot replacement.
Air-Gap vs. Non-Air-Gap Spigot
For RO systems specifically, the choice between an air-gap and non-air-gap spigot matters. An air-gap spigot has three ports — inlet, outlet, and drain — and creates a physical break between the drain line and the filtered water line, preventing back-siphonage. Some plumbing codes require air-gap spigots for RO systems. Non-air-gap spigots are simpler and less prone to gurgling noises, but they provide no backflow protection. Check your local plumbing requirements before deciding — in many municipalities, the air-gap spigot is the only code-compliant option for under-sink RO installations.
Flow Rate Considerations for Spigot Selection
The spigot itself doesn't restrict flow, but the internal tubing diameter and filter capacity do. Standard RO spigots flow at about 0.5–1.0 gallon per minute from the pressurized tank. Multi-stage carbon systems can flow faster — some push 1.5–2.0 gallons per minute — because they don't rely on a membrane or storage tank. If fast fill times for pots and pitchers matter to you, an inline carbon or multi-stage system feeding directly through a high-flow spigot will always outperform an RO setup on speed, even if the RO wins on filtration thoroughness.
Maintenance Schedule and Filter Replacement — What Actually Needs Doing
Under faucet systems are low-maintenance by design, but they're not zero-maintenance. Skipping cartridge replacements doesn't just reduce filtration effectiveness — in some cases it can make water quality worse by releasing trapped contaminants back into the water or by allowing bacterial growth in saturated carbon media.
- Sediment pre-filter: Replace every 3–6 months. Sediment filters can clog faster in areas with hard water or older pipes. A drop in water pressure from the spigot is usually the first sign a sediment filter needs changing.
- Carbon block cartridge: Replace every 6–12 months depending on usage and water quality. A return of chlorine taste or odor indicates the carbon is exhausted.
- RO membrane: Replace every 2–5 years. Membranes last longer in lower-TDS water and are best checked annually with a TDS meter. If your filtered water TDS rises significantly above its baseline reading, the membrane needs replacing.
- Post-filter (polishing filter): Replace annually or with every membrane change on an RO system.
- Storage tank (RO): Sanitize annually with a diluted bleach solution, following the manufacturer's procedure. Stagnant water in a tank that's not used frequently can develop off-tastes or microbial growth.
Set a calendar reminder when you install a new cartridge — it's the simplest way to stay on schedule. Many manufacturers now sell subscription replacement cartridge plans that ship automatically on the correct schedule, which removes one more thing to remember.
Under Faucet Filters vs. Other Filtration Options — A Direct Comparison
Under faucet systems aren't the only way to filter drinking water, and they're not always the best choice for every situation. Here's how they stack up against the most common alternatives.
| Filter Type | Upfront Cost | Annual Running Cost | Filtration Quality | Convenience |
|---|---|---|---|---|
| Pitcher Filter | $25–$50 | $60–$120 | Basic | Low (refilling required) |
| Faucet-Mounted Filter | $20–$60 | $50–$100 | Basic–Moderate | Moderate (spigot switch needed) |
| Under Faucet (Carbon) | $40–$120 | $40–$80 | Moderate | High (always on) |
| Under Faucet (RO) | $150–$500 | $50–$150 | Excellent | High (dedicated spigot) |
| Whole House System | $500–$3,000+ | $100–$400 | Moderate–Excellent | Highest (all taps filtered) |
Faucet-mounted filters — the type that clamps onto the end of an existing spigot — are often confused with under faucet filters, but they're a different category. They're cheaper and require no installation, but they slow spigot flow noticeably, they don't fit all faucet types (particularly pull-down and pull-out models), and their cartridge capacity is lower. An under faucet system is almost always a better long-term investment if you're committed to filtering your drinking water consistently.
Common Problems with Under Faucet Systems and How to Fix Them
Even well-installed systems develop issues occasionally. Most problems are minor and traceable to one of a handful of causes.
Low Water Pressure from the Filtered Spigot
The most common complaint. Low flow from a carbon or multi-stage system almost always means a clogged sediment pre-filter. Replace it. For RO systems, low pressure from the spigot usually points to a depleted storage tank — check that the tank pressure is between 7 and 10 PSI when empty using a standard tire pressure gauge on the Schrader valve at the bottom of the tank. If pressure is too low, add air with a bicycle pump. If pressure is correct but flow is still slow, the RO membrane may be spent.
Water Dripping from the Spigot When Not in Use
A slow drip from the filtered water spigot on an RO system is usually caused by a failed auto-shutoff valve — the component that stops the RO from filling the tank once it's full. A replacement auto-shutoff valve costs about $10–$20 and is a direct swap. For non-RO systems, a dripping spigot is more often a worn spigot cartridge or O-ring, which are inexpensive to replace.
Unusual Taste or Odor in Filtered Water
A musty or plasticky taste in the first few days after installing new cartridges is normal — it's residual manufacturing material flushing out. Run several gallons through the system before drinking. If the off-taste persists after a week, check that you've installed the correct cartridge type for your system and that all cartridges are seated properly. A chlorine taste returning to previously filtered water is a sign the carbon media is exhausted and needs replacement.
Leaking Connections
Push-to-connect fittings occasionally leak if the tubing isn't cut squarely or isn't pushed in far enough. Cut the tubing end cleanly and squarely with a sharp blade — not scissors, which crush the tube and prevent a proper seal. Push the tube in with firm, even pressure until it can't go further. For threaded connections, two to three wraps of PTFE tape on the male threads usually stops any weeping at the joint.

Under Faucet Filters for Renters — What's Actually Possible
Renters often assume under faucet filtration is off the table because they can't make permanent modifications. That's not entirely accurate. Several configurations work well in rental situations without requiring any drilling or permanent plumbing changes.
If your existing kitchen spigot uses a standard aerator thread — which most do — a compact inline carbon filter can be connected between the supply line and the faucet body using existing connections, storing the filter housing inside the cabinet. This requires no new holes and leaves no marks. When you move, disconnect the filter, reconnect the original supply line, and the sink is exactly as you found it.
Full RO systems are harder to install without modification, but some landlords will allow the addition of a spigot through an existing knockout hole — especially if you agree to patch or cap it on move-out. Always get written permission before drilling into any sink or countertop in a rental.
Countertop RO systems — which connect via a diverter valve screwed onto the existing spigot aerator — offer near-RO filtration quality without any under-sink installation. They're bulkier than true under faucet systems, but they're completely renter-friendly and move with you.
Water Waste in RO Systems — The Honest Numbers
Reverse osmosis under faucet systems produce wastewater during the filtration process — water that carries the rejected contaminants down the drain. Older RO systems wasted as much as 4 gallons for every 1 gallon of filtered water produced. Modern high-efficiency RO membranes have improved this significantly — many current systems produce 1 gallon of wastewater for every 1 gallon filtered, and some claim ratios as low as 1:0.5.
For a household that consumes 3 gallons of filtered water per day from an RO spigot, a 2:1 waste ratio means 6 gallons per day of wastewater, or about 180 gallons per month. At average US water rates, that's roughly $0.50–$1.00 per month in additional water cost — negligible for most households but worth factoring in if you're in a drought-prone region with high water rates.
The RO drain water isn't toxic — it's just concentrated with the minerals and dissolved solids that were filtered out. Some people route it to water outdoor plants (checking that TDS levels aren't too high for sensitive plants), use it for mopping, or run it to a washing machine. These practices reduce waste without any downside.
Key Questions to Ask Before Buying an Under Faucet System
The market for under faucet filters is crowded, and many products make broad claims about filtration performance without specifying testing standards. Here's what to look for and ask before committing.
- Is the system NSF certified? NSF International certifies water filters against specific standards. NSF/ANSI 42 covers aesthetic improvements (taste, odor, chlorine). NSF/ANSI 53 covers health-effect contaminants (lead, cysts, VOCs). NSF/ANSI 58 covers RO systems. NSF/ANSI 401 covers emerging contaminants including pharmaceuticals and hormones. A system certified to the standard relevant to your water problems is worth paying more for.
- What is the rated capacity? Filter capacity is expressed in gallons — for example, "filters up to 500 gallons." Divide your daily filtered water use into that number to estimate how long a cartridge will last. If your household uses 2 gallons per day, a 500-gallon cartridge lasts about 250 days, or roughly 8 months.
- Are replacement cartridges readily available and reasonably priced? Some brands lock you into proprietary cartridges that are expensive and only available through the manufacturer. Others use standard industry-size cartridges (the most common being 10-inch × 2.5-inch) that are widely available from multiple suppliers, giving you cost competition and availability.
- Does your spigot type allow a dedicated dispensing line? Pull-down and pull-out faucets use a weight on the hose inside the cabinet — this can conflict with under-sink filter housing placement. Measure your available cabinet space carefully before ordering a large multi-canister system.
- What is the water pressure requirement? RO membranes need at least 40–50 PSI of incoming water pressure to function properly. If your home water pressure runs below that, you'll need a booster pump — an added cost of $50–$150. Low-pressure homes on well systems especially need to check this before purchasing.


