
 English
 русский
 日本語
日本語 عربى
عربى Español
Content
- 1 Match the Symptom to the Cause First
- 2 Reseat the Bottle and Clear the Airlock
- 3 Thaw a Frozen Cold Tank
- 4 Check the Pump and Suction Tube on Bottom-Loading Units
- 5 Clean or Replace the Taps
- 6 Inspect the Internal Silicone Tubing
- 7 No Parts on Hand? Bottle Pumps Keep the Water Coming
- 8 Prevention Habits That Keep Water Flowing
- 9 Frequently Asked Questions
- 9.1 Why does my Primo dispenser hum but dispense no water?
- 9.2 How long does it take to thaw a frozen water tank?
- 9.3 Why did only the hot tap stop working?
- 9.4 Can I replace the tap on a Primo dispenser myself?
- 9.5 I put a brand-new bottle on and still nothing comes out. Why?
- 9.6 When is it smarter to replace the dispenser than repair it?
- 9.7 Does hard water really cause dispensing problems?
A Primo water dispenser that suddenly stops dispensing almost always traces back to one of four causes: the bottle is not seated or venting correctly, the cold tank has frozen solid, the pump on a bottom-loading unit has lost its prime, or a tap has worn out or clogged. Three of the four take less than fifteen minutes to put right with a towel, a basin, and some white vinegar, and none of them means the machine is finished.
Quick answer first. On a top-loading unit, lift the bottle off, rinse and reseat the white plastic baffle inside the reservoir, set the bottle down squarely, and wait two to three minutes before running each tap until the sputtering stops. On a bottom-loading unit, confirm the wall outlet has power, make sure the suction tube still reaches the bottom of the bottle, then unplug for thirty seconds and hold a tap open for up to thirty seconds so the pump can re-prime. If only the cold tap has died while the unit hums along, unplug the whole dispenser for twenty-four hours; a frozen tank, not a broken machine, is the most likely reason.
Match the Symptom to the Cause First
Before you unscrew anything, spend one minute working out which version of the problem you actually have. Dispensers fail in patterns, and the pattern points to the fix. The most useful split is top-load versus bottom-load. A top-loader depends on gravity, so a dead flow means something between the bottle neck and the tap is blocked or sealed wrong. A bottom-loader pulls water up with an electric pump, so a machine that sits silent points to power or electronics, while a machine that hums but gives no water points to a lost prime or an air leak in the suction line.
| What you see | Most likely cause | First move |
|---|---|---|
| No water from any tap, top-loading unit | Bottle seal not pierced, or baffle missing | Reseat the bottle and check the baffle |
| Cold tap slows for days, then stops | Frozen cold tank | Unplug for 24 hours to thaw |
| Bottom-loading unit hums, no water | Pump lost prime or tube off the water | Reseat tube, hold a tap open to prime |
| Bottom-loading unit is silent | No power or control fault | Test the outlet, power-cycle the unit |
| Hot tap only refuses to run | Refill lock or child-resistant tap | Wait, then operate the lock fully |
| One tap trickles, the other pours fine | Scale or debris inside that tap | Remove and vinegar-soak the tap |
One practical note before you start. A full 5-gallon bottle weighs roughly 42 pounds, about 19 kilograms, so lay a towel down, lift with your legs, and keep the bottle well back from the counter edge while you work.
Reseat the Bottle and Clear the Airlock
Most no-flow complaints on top-loading Primo units end at the bottle rather than inside the machine. When a fresh bottle is set on the ring, the dispenser probe has to pierce the liner inside the bottle cap, and the reservoir needs its small white baffle in place to feed the tanks correctly. If the bottle sits at an angle, or the baffle is missing or flipped, air cannot replace the water as it drains, and the taps run dry even with a full bottle on top. Work through these steps in order.
- Lift the bottle straight off the unit and set it aside. A full 5-gallon bottle weighs about 42 pounds, so bend at the knees or use a bottle handle rather than swinging it into your arms.
- Look into the reservoir opening and find the white plastic baffle. Rinse it under warm water and seat it back on its ledge the right way up. On many Primo models this small disc regulates how water feeds into the tanks.
- Check the cap of the bottle itself. If the liner is still completely intact, the probe never punctured it and water physically cannot leave the bottle. Reseat the bottle squarely and press down evenly so the probe cuts through.
- Wait two to three minutes. Gravity has to refill the cold and hot tanks before either tap will run steady.
- Open each tap and let it run until the flow stops sputtering. Air in the lines after a bottle change is normal.
If the dispenser pours well right after a bottle change but slows again a day later, suspect a vacuum lock rather than a bad bottle. The seal ring under the bottle can shift just enough to block the vent path that lets air back in as water drains out. Lift the bottle, re-center it on the ring, and the flow usually comes straight back.
Thaw a Frozen Cold Tank
The classic sequence looks like this: the cold tap gets weaker over several days, then nothing comes out at all, while the hot tap still works and the unit hums as if nothing happened. That is a frozen cold tank, and it shows up most often when the cold dial sits at its maximum setting in a cool room, or when the unit lives in an unheated garage or beside a strong air-conditioning draft.
- Unplug the dispenser and open both taps over a basin with towels underneath.
- Leave the unit unplugged for a full twenty-four hours. Ice deep inside the tank melts slowly, and plugging the machine back in early just refreezes the line.
- Turn the cold dial to the middle once it has thawed. Maximum is not a better setting; it is a freeze waiting to happen.
- Plug the unit back in, run both taps until the flow is steady, and taste a glass before regular use.
Never pour hot water into the reservoir or aim a heater at the cabinet to speed the thaw up. The sudden temperature swing can crack plastic tanks and fittings, and warm, moist air blown into the vents is bad news for the electronics inside.
If the tank freezes a second time even at a middle setting, the cold control itself is drifting, and the thermostat behind that dial is the part to replace. When freezing only happens in winter, the room is the culprit; move the unit away from exterior walls and cold drafts and the problem usually leaves with the season.
Check the Pump and Suction Tube on Bottom-Loading Units
Bottom-loading models hide the bottle in the lower cabinet and pull water up to the taps with a small electric pump. In most designs the pump has to lift the water close to a meter, so even a small air leak, a split tube, or a tube that no longer reaches the water will starve the whole machine. Work through the checks in this order.
- Prove the outlet before blaming the dispenser. Plug a phone charger or a lamp into the same socket, and run the unit directly from the wall rather than through an extension cord, which can starve the pump of current.
- Slide the bottle cabinet open and lift the suction tube out. Confirm the tube runs all the way to the bottom of the bottle and that the collar seats flush into the bottle mouth. A floating tube drinks air instead of water.
- Unplug the unit for thirty seconds and plug it back in. Most bottom-loading Primo dispensers re-prime their pump automatically after a restart.
- Hold a tap open and give the pump up to thirty seconds. A burst of air and some sputtering at first is normal while water climbs the line.
The sounds tell you where the fault sits. A humming pump that never moves water means a lost prime, an air leak, or a cracked tube. Total silence points to the outlet or the control side of the machine. A loud slurping noise usually means the collar is not sealing the bottle mouth, which lets air sneak in around the tube.
Clean or Replace the Taps
A tap cycles thousands of times a year, and the water passing through it carries dissolved minerals. Scale builds up on the valve seat, a seal hardens, and one day the tap gives you a trickle or a lever that will not spring back. Hard water speeds this up dramatically: water above 180 milligrams per liter of dissolved calcium carbonate, the measure the U.S. Geological Survey uses for hardness, falls into its very hard range, and that is exactly the water that cruds a tap shut within a couple of years.
- Twist the tap counterclockwise out of its collar and catch the drips with a towel. Most dispenser taps are simple threaded fittings.
- Wash it in warm, soapy water and scrub the nozzle and lever with a soft brush.
- Soak the tap for ten to fifteen minutes in a bath of half white vinegar and half water to dissolve the scale, then rinse it thoroughly.
- Screw it back in snugly, run a full glass to waste, and check for drips around the collar.
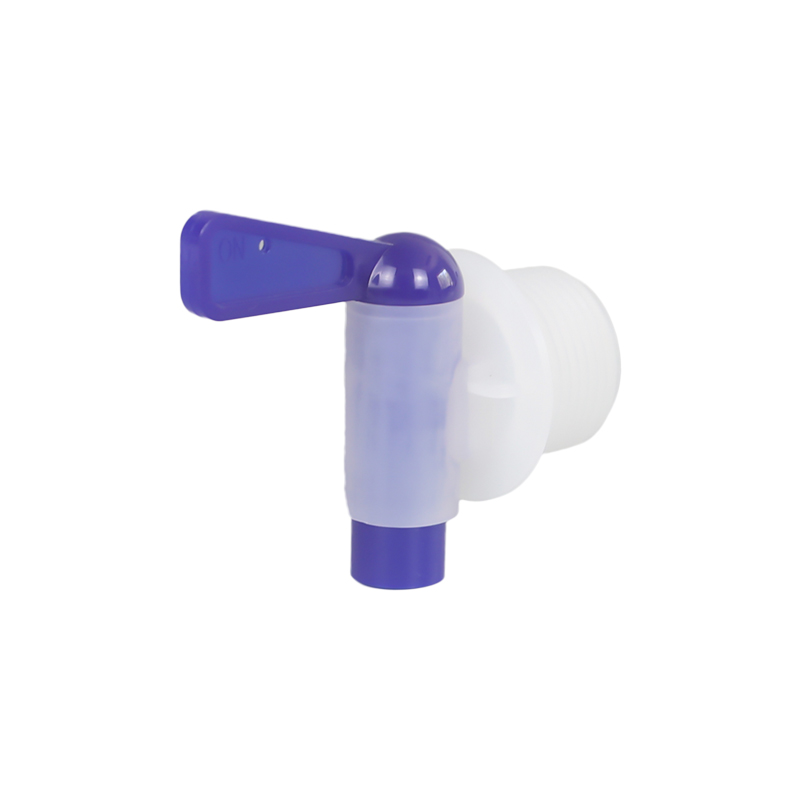
Replace the tap instead of cleaning it when the lever spring is dead, when it still drips after a vinegar soak, or when you can see cracks around the base. Taps are consumable parts, and a replacement costs a fraction of a service visit. Match three things when you buy: the thread size of your collar, the length of the tap shank, and whether the tap serves the cold or the hot side. Hot-side taps are built differently, and many include a scald guard and a child-resistant lock. One related point catches a lot of owners: on many hot taps you must press the lock button fully while lifting the lever, and a tap that seems broken is often just a lock that was never fully released.
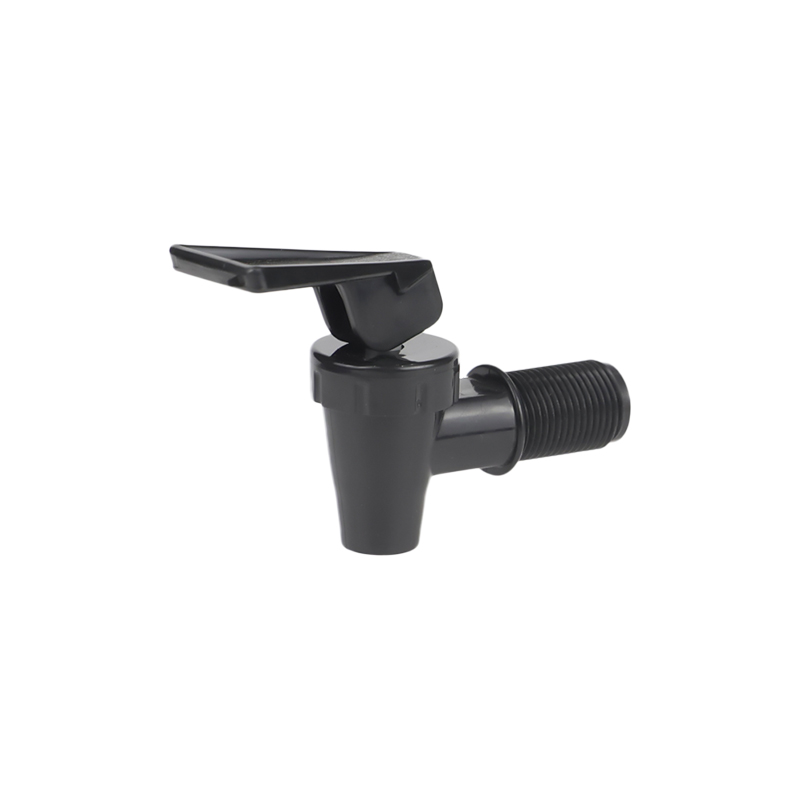 Hot and Cold Water Dispenser Tap ReplacementA replacement tap for water dispensers, offered in PP, PC, or ABS with handle and O-rings. Useful when the original tap drips, has a dead spring, or cracks, provided thread size and shank length match your collar.View Product →
For the swap itself, our step-by-step guide on how to install a water dispenser faucet walks through removal, seating the shank, and leak-testing the new tap, and the same steps apply to most Primo-style collars.
Inspect the Internal Silicone Tubing
Between the bottle, the tanks, and the taps run short lengths of food-grade silicone tubing, and it fails in three familiar ways: a kink where the unit was pushed back against the wall, a tube that walked off its fitting during a move, or a line that has hardened and cracked with age, especially on the hot side where the water runs close to boiling.
- Pull the unit forward and look behind it first. A crushed rear line is the cheapest diagnosis you will ever make.
- Trace each line you can reach with your fingers and feel for soft kinks; straighten them and give the machine a little more clearance from the wall.
- Push any tube that has slipped off its fitting back on firmly; a proper seat takes a definite press, not a gentle nudge.
- Replace any tube that is cloudy, permanently flattened, or cracked at a bend. Fresh food-grade silicone tubing rated for hot and cold drinks is inexpensive and sold cut to length.
Unplug the dispenser and let the hot tank cool before you pull any line near the hot side, because that water can be close to boiling. Take a photo of the routing before you disconnect anything, so everything goes back exactly the way it came out.
Silicone is the material to insist on for the replacement because it handles hot and cold lines without softening or taking on odor, and it seats back into the same fittings as the original hose.
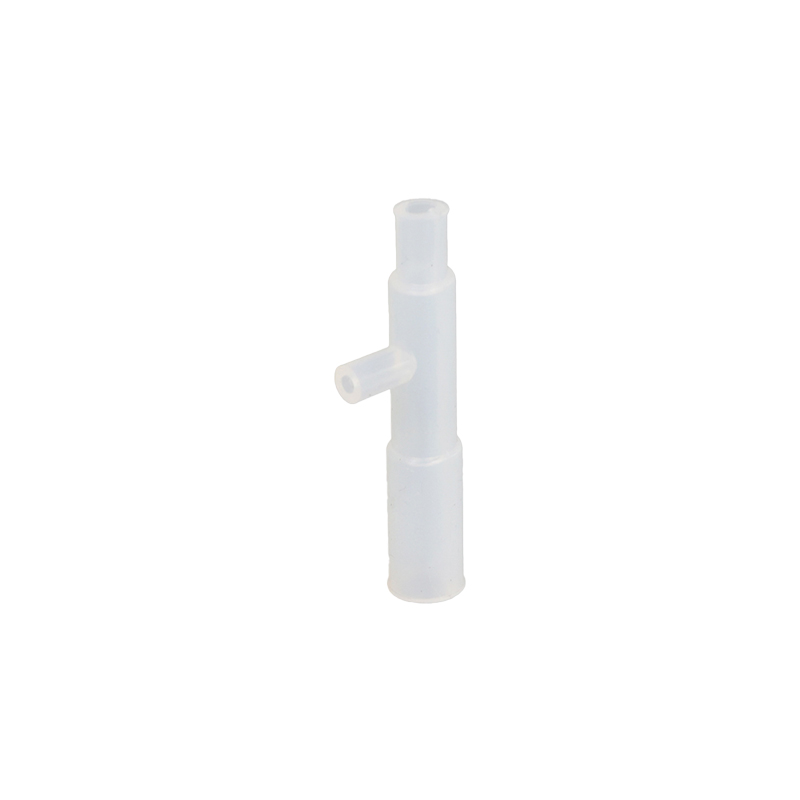 Food-Grade Silicone Tubing for Tap and Quick FittingsClear, flexible food-grade silicone tubing that resists heat, cold, and odors. It connects taps or quick fittings on dispensers and seats back into original fittings, making it a reliable choice for replacement hose lines.View Product →
No Parts on Hand? Bottle Pumps Keep the Water Coming
If the machine has to go out for repair, or the replacement tap is still in the mail, you do not have to wrestle a 42-pound bottle every time you want a glass of water. A USB rechargeable bottle pump sits straight on the mouth of a standard 5-gallon bottle and dispenses with one button, no installation and no tools. Manufacturers commonly rate a single charge at around a month of light household use, and a manual press pump needs no power at all, which has saved more than one office during a blackout or a move.
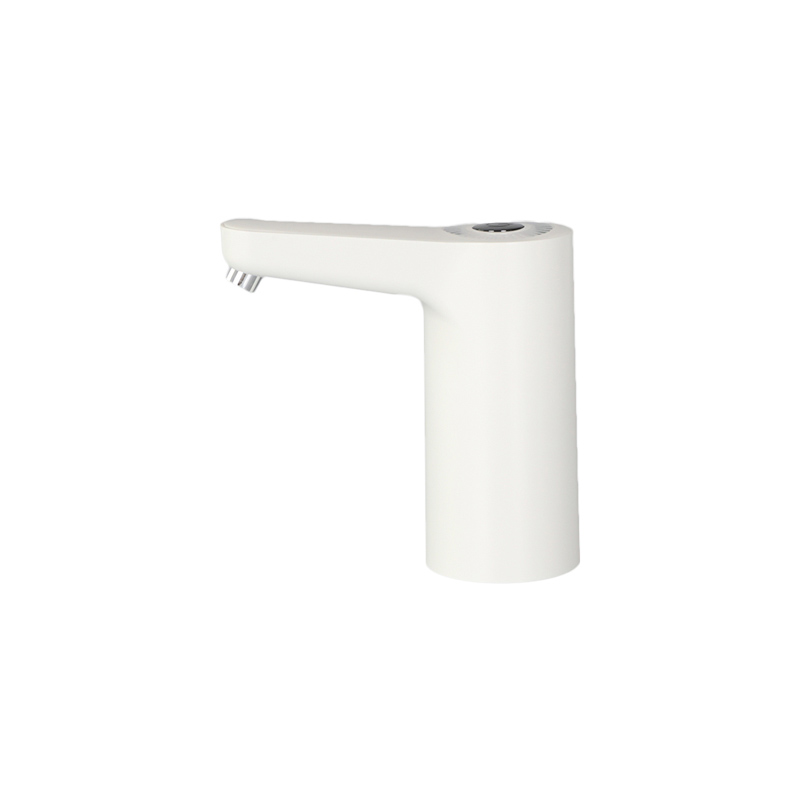 USB Rechargeable Water Pump for 5 Gallon BottlesA PC+ABS USB rechargeable pump that sits on a standard 5-gallon bottle and dispenses water at the push of a button. A practical stopgap when your dispenser is out for repair or parts are still shipping.View Product →
Both styles, along with taps, silicone tubing, and bottle stands sized for standard 5-gallon bottles, are listed in our dispenser parts catalogue, so you can keep water flowing while the dispenser itself waits for its fix.
Prevention Habits That Keep Water Flowing
Almost every no-flow complaint traces back to skipped maintenance or one extreme setting. A short routine keeps the machine out of trouble.
- Rinse the reservoir, baffle, and taps every three to six months. Primo's own care guidance calls for periodic cleaning, and the exact interval sits in your model's manual; homes with hard water do well to tighten the schedule.
- Keep the cold dial at the middle. The midpoint chills water plenty and stays well clear of freezing.
- Leave 5 to 10 centimeters of clear space behind the unit so the vents can breathe.
- Swap a tap the first time it drips. The EPA's WaterSense program estimates that a faucet leaking once per second wastes more than 3,000 gallons across a year, which is more than 11,000 liters lost to a drip small enough to ignore.
- Glance at the baffle every time you change the bottle; a cracked or missing baffle causes slow, mysterious flow problems.
- On bottom-loading units, listen for slurping at each bottle change; that sound means the tube collar is not sealing, and the pump is next in line to struggle.
| Task | How often | Why it matters |
|---|---|---|
| Rinse the reservoir, baffle, and taps | Every 3 to 6 months | Stops scale and film before they block the flow |
| Vinegar-soak each tap | Every 3 months in hard-water homes | Dissolves mineral crust on the valve seat |
| Check rear clearance and line kinks | Every bottle change | Prevents crushed and kinked tubing |
| Inspect the suction tube and collar | Every bottle change on bottom-load units | Catches air leaks before the pump loses prime |
| Confirm the cold dial sits at midpoint | After every move or thaw | Keeps the tank out of freeze territory |
Frequently Asked Questions
Why does my Primo dispenser hum but dispense no water?
On a bottom-loading unit, a humming pump with no water means the pump has lost its prime or the suction tube is not reaching the water; unplug for thirty seconds, plug back in, and hold a tap open for up to thirty seconds. On a top-loading unit, a hum with no flow usually means a frozen tank, so the twenty-four-hour thaw is the fix to try first.
How long does it take to thaw a frozen water tank?
Plan on a full twenty-four hours unplugged with the taps open over a basin. It is slow because the ice sits deep in the tank and the lines. Do not try to hurry it with heaters or hot water, because the temperature swing can crack the plastic parts.
Why did only the hot tap stop working?
Three usual reasons: the child-resistant lock on the tap was not pressed fully while you lifted the lever, the hot tank was drained and has not finished refilling and reheating, or the hot tap's seal has failed after years of scale. Work through them in that order before replacing anything.
Can I replace the tap on a Primo dispenser myself?
Yes. Most taps are simple threaded fittings: twist the old one out counterclockwise, match the thread and shank length on the replacement, note whether it serves the hot or cold side, screw the new one in snugly, and run a glass of water to check for leaks. The whole job usually takes about ten minutes.
I put a brand-new bottle on and still nothing comes out. Why?
Check three things. The bottle cap liner may never have been pierced by the probe, the white baffle may be missing or flipped inside the reservoir, or the tanks simply need two to three minutes to refill after the bottle change. Reseating the bottle squarely and waiting solves most of these cases.
When is it smarter to replace the dispenser than repair it?
Repair wins whenever the fix is a tap, a tube, or a reseated bottle, because those parts cost little and take minutes. Replacement starts to make sense when the cold tank repeatedly freezes even at a middle setting, when a bottom-loading pump fails and no matching pump is available for the model, or when a tank or fitting has cracked. Those faults point at the core of the machine rather than its consumable parts.
Does hard water really cause dispensing problems?
It does. Scale from hard water narrows the passages inside taps and coats tanks and sensor parts, and the U.S. Geological Survey places water above 180 milligrams per liter of dissolved calcium carbonate in the very hard range, where buildup shows up fastest. Regular vinegar soaks and a mid-range cold setting keep a hard-water machine flowing far longer.