
 English
 русский
 日本語
日本語 عربى
عربى Español
Content
- 1 How to Take Out a Kitchen Faucet: What You Need to Know First
- 2 Tools and Materials You Need Before Starting
- 3 Step 1 — Shut Off the Water Supply to the Faucet
- 4 Step 2 — Disconnect the Supply Lines from the Faucet
- 5 Step 3 — Loosen and Remove the Faucet Mounting Nut
- 6 Step 4 — Disconnect the Sprayer Hose (If Your Faucet Has One)
- 7 Step 5 — Break the Seal and Lift the Faucet Free
- 8 Common Problems When Removing a Kitchen Faucet — and How to Solve Them
- 8.1 Problem: Mounting Nut Won't Budge
- 8.2 Problem: Supply Line Coupling Nut Is Rounded Off
- 8.3 Problem: Shut-Off Valve Won't Close Fully
- 8.4 Problem: No Access to Supply Line Connections
- 8.5 Problem: The Faucet Base Is Stuck After Removing the Nut
- 8.6 Problem: Old Faucet Has a Deck Plate Covering Multiple Holes
- 9 How Removal Differs by Faucet Type
- 10 How Sink Material Affects Faucet Removal
- 11 Safety Precautions to Follow Throughout the Process
- 12 When to Call a Professional Plumber Instead
- 13 What to Do After the Old Faucet Is Out
- 14 Frequently Asked Questions About Removing a Kitchen Faucet
- 14.1 How long does it take to remove a kitchen faucet?
- 14.2 Do I need to shut off the main water supply to replace a kitchen faucet?
- 14.3 What is the difference between a faucet and a spigot in the kitchen context?
- 14.4 Can I remove a kitchen faucet without a basin wrench?
- 14.5 My shut-off valve is stuck and won't turn — what do I do?
- 14.6 How do I remove a kitchen faucet if there is no access under the sink?
- 14.7 Is it possible to remove a kitchen faucet without draining the pipes first?
- 14.8 What should I do if the supply line connection is leaking after I reinstall the valves?
- 14.9 Can I reuse the supply lines from my old faucet?
- 14.10 How do I know what size replacement faucet to buy after removing the old one?
How to Take Out a Kitchen Faucet: What You Need to Know First
Removing a kitchen faucet is a manageable DIY task that most homeowners can complete in 60 to 90 minutes with basic tools. The core process involves shutting off the water supply, disconnecting the supply lines, loosening the mounting hardware beneath the sink, and lifting the faucet body free from the sink deck. Whether you're replacing an old spigot that drips constantly or upgrading to a modern pull-down model, understanding each step prevents leaks, stripped nuts, and unnecessary frustration. This guide covers every detail — from the tools you'll need to the tricky situations that slow most people down.
Quick Summary: Turn off supply valves → Disconnect supply lines → Remove mounting nut → Disconnect sprayer hose (if present) → Lift faucet out. Read on for the full breakdown of each stage.
Tools and Materials You Need Before Starting
Having the right tools on hand before you slide under the sink saves multiple trips to the hardware store. A typical kitchen faucet removal calls for the following:
Basin Wrench
The single most important tool for this job. Its long handle and swiveling jaw reach the mounting nuts located deep inside the cabinet, behind the sink basin. Without it, removing a faucet on a standard 8-inch to 10-inch deep cabinet is nearly impossible by hand.
Adjustable Pliers or Channel-Lock Pliers
Used to loosen the coupling nuts on supply lines. Choose pliers with a jaw opening of at least 1.5 inches to handle standard 3/8-inch compression fittings and braided stainless supply lines.
Bucket and Towels
Even after shutting off the supply valves, residual water remains inside the lines and inside the faucet body. A small bucket placed beneath the supply line connections catches this water and keeps your cabinet dry.
Flashlight or Headlamp
Under-sink cabinets are dark. A hands-free headlamp makes it easier to identify the mounting nut, locate the supply line connections, and spot any corrosion or mineral buildup that may complicate removal.
Penetrating Lubricant (WD-40 or PB Blaster)
Old faucets that have been in place for 10 years or more often have corroded or stuck mounting nuts. A penetrating lubricant applied 15 to 30 minutes before removal makes a significant difference. PB Blaster is generally considered more effective on mineral-encrusted nuts than standard WD-40.
Utility Knife or Putty Knife
Many faucets are sealed to the sink deck with plumber's putty or silicone caulk. A utility knife scores the sealant around the faucet base, and a putty knife pries the base free without scratching the sink surface.
| Tool | Purpose | Estimated Cost (USD) |
|---|---|---|
| Basin Wrench | Loosen mounting nut under sink | $15 – $35 |
| Channel-Lock Pliers | Disconnect supply lines | $12 – $30 |
| Penetrating Lubricant | Free stuck or corroded nuts | $6 – $12 |
| Utility Knife | Cut sealant around faucet base | $5 – $10 |
| Bucket and Towels | Catch residual water | $2 – $8 |
Step 1 — Shut Off the Water Supply to the Faucet
Before touching a single nut or supply line, locate the shut-off valves under the sink. Most kitchens have two valves — one for hot water and one for cold — positioned along the supply pipes that run from the wall or floor up to the faucet connections.
Locate the Valves
Open the cabinet beneath the sink. Look for two oval or football-shaped valves on the supply pipes. They are usually chrome or brass-colored. If your kitchen has a separate sprayer or side spigot, there may be a third supply line, though most standard kitchens use only two.
Turn the Valves Clockwise
Rotate each valve handle clockwise until it stops. For oval (compression) style valves, this usually means about 1/4 to 1/2 turn. For older multi-turn gate valves, you may need to turn them many times before they stop. Do not overtighten — these valves can develop leaks at their packing nut if forced.
Relieve Pressure at the Faucet
Turn on the kitchen faucet (both hot and cold handles or the single lever) and let it run until water stops flowing. This releases residual pressure in the supply lines and drains most of the standing water from the faucet body. Opening the faucet in the ON position also prevents any vacuum that could trap water inside the lines.
What If There Are No Shut-Off Valves?
Some older homes — particularly those built before the 1960s — lack individual fixture shut-off valves under the sink. In this case, you'll need to shut off the main water supply to the house. The main shut-off is typically located near the water meter, in a basement, crawlspace, or utility room. After shutting the main valve, open a lower-level faucet (like a hose bib or basement spigot) to drain pressure from the lines before proceeding.

Step 2 — Disconnect the Supply Lines from the Faucet
With the water off and pressure relieved, the next step is disconnecting the supply lines. These are the flexible tubes — typically braided stainless steel or plastic — that run from the shut-off valves up to the faucet inlets (called the inlet shanks or supply tubes).
Place your bucket directly beneath the connection points before loosening anything. Even small residual amounts of water will drip when you break the connection, and accumulated mineral deposits can create a light spray. Having a towel ready underneath prevents cabinet floor damage.
Use your channel-lock pliers to grip the coupling nut at the top of the supply line — the end that connects to the faucet's inlet shank. Turn counterclockwise to loosen. Hold the supply line itself steady with your other hand to prevent it from twisting. Once loose, unscrew the nut by hand the rest of the way and let the line drop down into the bucket.
Repeat for both hot and cold supply lines. If the lines are corroded or have plastic nuts that feel brittle, wrap a rag around the nut before gripping with pliers to reduce the risk of cracking. Replacement supply lines cost as little as $5 to $15 each, so if the lines look questionable, plan to replace them when you install the new faucet.
Pro Tip: If the supply lines are rigid copper tubes soldered to angle stop valves, do not attempt to bend them free. You'll need to use a tube cutter to cut the copper just below the faucet inlet, then re-connect using a compression fitting or flexible supply line when installing the new faucet.
Step 3 — Loosen and Remove the Faucet Mounting Nut
This step is where most people run into difficulty. The mounting nut — the large nut that holds the faucet body to the sink deck from below — is located in a tight space, often flush against the underside of the sink basin. A standard wrench can't reach it. That's why a basin wrench is essential.
How a Basin Wrench Works
A basin wrench has a long, T-shaped handle — typically 16 to 18 inches long — with a pivoting jaw at the end. The jaw is designed to latch onto the flat sides of a mounting nut and turn it without requiring a wide swing arc. This allows you to work in the narrow gap between the supply pipes and the underside of the basin.
Positioning and Technique
Lie on your back inside the cabinet or kneel on a mat in front of it. Slide the basin wrench up along the faucet shanks until the jaw engages the bottom of the mounting nut. For counterclockwise (loosening) direction, ensure the jaw is oriented to bite in that direction — most basin wrenches have a reversible jaw that you flip depending on the direction needed.
Apply steady, firm pressure. If the nut doesn't budge, this is where penetrating lubricant makes a difference. Spray PB Blaster or WD-40 up into the threads, wait 15 to 20 minutes, and try again. Avoid using excessive force, which can crack older plastic nuts or damage the sink deck on thin-gauge stainless steel sinks.
Once the nut breaks loose, continue unscrewing it by hand or with the wrench. Some faucets — particularly single-hole designs with a large spigot body — use a plastic retainer nut that can be loosened by hand once the first movement is achieved. Others use a metal lock nut that requires the full wrench engagement throughout removal.
Faucets with Multiple Holes
A widespread faucet (the type with separate hot and cold handles spaced 8 inches apart from a center spout) has three individual mounting nuts — one under each of the three components. Remove all three before attempting to lift any component free. On some widespread faucets, the deck plate or escutcheon plate also has its own retaining hardware separate from the individual handles and spout.
Note on Plastic vs. Metal Nuts: Post-2010 faucets from brands like Moen, Delta, and Kohler increasingly use large plastic mounting nuts that can be hand-tightened. These are faster to remove but more prone to cracking if gripped with metal-jaw pliers. When possible, use hand pressure or a strap wrench on plastic hardware.
Step 4 — Disconnect the Sprayer Hose (If Your Faucet Has One)
Many modern kitchen faucets include a side sprayer spigot mounted through a dedicated hole in the sink deck, or a pull-out/pull-down spray head integrated into the faucet body. Each type requires a slightly different disconnection approach.
Side Sprayer (Separate Spigot Mounted Through Sink)
The side sprayer connects to the faucet body via a flexible hose that runs through the cabinet. Locate where the hose attaches to the faucet body — typically a threaded nipple under the sink. Use pliers to unscrew the coupling nut at this connection. Then, push the hose downward through the sink hole from above, or pull it up from below. The sprayer spigot itself is usually held in place by a small clip or mounting nut beneath the sink deck. Remove this fastener and the spigot lifts free from above.
Pull-Out or Pull-Down Spray Head (Integrated)
For faucets with a pull-out or pull-down sprayer built into the spout, the spray hose connects at the faucet body's supply inlet. Once you've disconnected the supply lines and removed the mounting nut, the spray hose is typically the only remaining connection. Pull the faucet body upward slightly, and the spray hose and weight (the counterweight that keeps the hose retracted) will come up with it. Disconnect the hose from the faucet at the quick-connect fitting — most use a press-button release mechanism or a simple threaded collar.
Keep Track of the Counterweight: Pull-out hose faucets use a weighted ring that clips onto the spray hose to help it retract. This weight often falls loose inside the cabinet during removal. If you're reusing the weight for a new faucet installation, set it aside in a labeled bag.
Step 5 — Break the Seal and Lift the Faucet Free
With all connections disconnected and the mounting nut removed, the faucet should be free to lift — but it often isn't quite yet. Most faucets are sealed to the sink deck with plumber's putty or silicone, which creates an adhesive bond that prevents the faucet from shifting during use.
Cutting Through Sealant
Score around the perimeter of the faucet base with a utility knife. Hold the knife at a low angle and work it between the faucet base and the sink surface, cutting through any putty or silicone bead. Go around the entire base at least twice. On porcelain or stone sinks, a plastic putty knife is safer than a metal blade, which can scratch the surface.
Twisting and Lifting
Once the sealant is scored, grip the faucet from above and twist it gently back and forth while pulling upward. The sealant will release in sections. If it resists significantly, run the utility knife around again, going slightly deeper. Do not use a pry bar or large lever tool directly against the sink surface — even a minor slip can chip porcelain or crack a thin granite overlay.
Cleaning the Sink Deck
After the old faucet is out, you'll see the residue of the old sealant on the sink deck around the faucet hole(s). Remove this using a plastic scraper. For silicone residue, apply a small amount of rubbing alcohol or silicone remover and let it soften the bead before scraping. For old plumber's putty, it usually lifts off cleanly in pieces. Wipe the surface with a dry cloth and let it fully dry before installing the new faucet.
Common Problems When Removing a Kitchen Faucet — and How to Solve Them
Even experienced plumbers encounter stubborn situations when pulling an old faucet. Here are the most frequent issues and practical solutions:
Problem: Mounting Nut Won't Budge
Mineral deposits from hard water can calcify around the mounting nut and the faucet shank over years of use. According to the U.S. Geological Survey, approximately 85% of American homes have hard water (defined as water with more than 60 mg/L of dissolved calcium and magnesium). This means most homeowners are likely to encounter this issue on faucets installed for five or more years.
Solution: Apply PB Blaster to the nut threads and let it penetrate for 30 minutes. If the nut still won't move, use a hack saw or an oscillating tool to carefully cut through the nut. Replacement nuts are cheap, and the goal at this point is simply to free the faucet without damaging the sink.
Problem: Supply Line Coupling Nut Is Rounded Off
Older supply line nuts — particularly chrome-plated plastic ones — round off easily under plier pressure. Once rounded, standard pliers can't grip them. Use a pair of locking pliers (Vise-Grips) clamped as tightly as possible onto what remains of the nut flats. If that fails, cut the supply line with a tubing cutter just below the nut. The line will be replaced anyway.
Problem: Shut-Off Valve Won't Close Fully
Compression-style shut-off valves that haven't been operated in years sometimes fail to close completely — water still trickles through even when fully turned. This is a valve packing failure. Do not attempt the faucet removal with a partially open valve. Shut off the main water supply instead, complete the faucet swap, and replace the faulty shut-off valve while you're under the sink.
Problem: No Access to Supply Line Connections
In some kitchen configurations — particularly in older homes with base cabinets built around the plumbing — there is minimal space to work under the sink. In these cases, remove as much from the cabinet as possible (cleaning supplies, bins, etc.) and use a mechanic's mirror with a flashlight to identify the connection points before reaching in. Flexible-head basin wrenches are particularly useful in extremely confined spaces.
Problem: The Faucet Base Is Stuck After Removing the Nut
Silicone sealant, especially if applied 10 or more years ago, can become very tenacious. If the faucet won't lift after scoring the sealant, apply a silicone-dissolving spray (such as Goo Gone Pro-Power) around the base from above, let it soak for 20 minutes, then re-score and attempt again. Patience here prevents damage to the sink surface.
Problem: Old Faucet Has a Deck Plate Covering Multiple Holes
A 3-hole sink with a single-handle faucet often uses a decorative deck plate (escutcheon) to cover the extra holes. The deck plate is held in place by its own set of retaining hardware under the sink — separate from the faucet mounting nut. Remove these first. The deck plate usually pries free from above once its fasteners are removed; score any sealant around it before lifting.
How Removal Differs by Faucet Type
Kitchen faucets come in several distinct configurations. The removal process shares the same core steps but has important variations depending on the design.
| Faucet Type | Mounting Points | Key Removal Difference | Difficulty |
|---|---|---|---|
| Single-Handle (1-hole) | 1 mounting nut | Most straightforward; one nut, two supply lines | Easy |
| Single-Handle with Deck Plate (3-hole) | 1 faucet nut + deck plate hardware | Must remove deck plate retainers separately | Moderate |
| Widespread (3-hole, 8" spread) | 3 individual mounting nuts | Three separate components; remove all nuts before lifting | Moderate |
| Pull-Out Spout (integrated sprayer) | 1 mounting nut | Disconnect spray hose quick-connect under sink | Easy-Moderate |
| Side Sprayer Spigot (separate) | 1 clip or nut in 4th hole | Disconnect hose at faucet body; remove clip under deck | Easy |
| Commercial-Style Bridge Faucet | 2 separate body nuts | Hot/cold handles and spout bridge connected by a pipe; disconnect all three from below | Moderate-Hard |
How Sink Material Affects Faucet Removal
The material and mounting style of your sink affects how carefully you need to proceed during faucet removal, particularly when cutting sealant and prying the faucet base free.
- Stainless Steel Sinks: Gauge matters. A heavy-gauge (16 to 18 gauge) stainless sink is forgiving. A lighter 22-gauge sink can flex and dent under pressure from pliers or pry tools. Work gently around the faucet hole, especially when twisting the faucet body to break the sealant seal.
- Porcelain or Cast Iron Sinks: Porcelain chips easily. Use only plastic scrapers or a very sharp, thin utility knife blade with light pressure to cut sealant. The faucet hole in a cast iron sink is thick and solid — it won't flex — but the porcelain surface around the hole is fragile. A dropped tool or an errant knife stroke creates chips that are difficult or impossible to repair invisibly.
- Composite or Granite Composite Sinks: These sinks are made from a mix of ground granite and acrylic resin. They're durable but can scratch. Use non-marring plastic tools when working around the sink surface. If the faucet is stuck with silicone, silicone remover won't harm the composite surface but test in an inconspicuous area first.
- Undermount Sinks: The faucet on an undermount installation is mounted through the counter (granite, quartz, laminate) rather than through the sink itself. This means the faucet hole is in the countertop. Be especially cautious with natural stone counters — granite and quartz can crack if excessive downward pressure is applied to the mounting hardware during removal.
Safety Precautions to Follow Throughout the Process
While faucet removal is a low-risk home improvement task, a few practical precautions prevent the most common minor accidents:
Verify the water is off before disconnecting any supply line. Turn on the kitchen faucet to confirm no water flows. A forgotten open valve under the sink will release water under pressure when the supply line coupling is loosened.
Clear the cabinet completely before getting underneath. Cleaning products, garbage bags, and stored items under the sink can shift and fall on you while you work in a confined position. A completely empty cabinet also gives you more room to maneuver.
Use knee pads or a folded mat if kneeling on a hard floor in front of the cabinet. Prolonged kneeling on tile or hardwood without padding can cause knee pain or bruising during a task that may take 45 to 90 minutes.
Wear safety glasses when working above your head under the sink. Debris, old sealant particles, mineral flakes, and residual water can fall into your eyes during the removal process.
Cap the supply valves if you plan to leave the faucet removed for more than a few minutes. If an existing shut-off valve fails while the supply line is disconnected, an uncapped valve can flood the cabinet. Supply line caps cost about $2 each and thread directly onto the valve outlet.
When to Call a Professional Plumber Instead
Most standard kitchen faucet removals are well within DIY reach. However, there are situations where calling a licensed plumber saves significant time, money, and stress:
- The shut-off valves beneath the sink are non-functional or absent, and you are uncomfortable shutting off the main water supply to the entire house.
- You discover active pipe corrosion, green or white mineral buildup on copper pipes, or signs of slow leaks in the supply lines that indicate broader plumbing issues beyond the faucet.
- The mounting nut has completely seized and cannot be freed with penetrating lubricant, and you lack a cutting tool capable of removing it without risking sink damage.
- The supply pipes beneath the sink are galvanized steel (common in homes built before 1960) and show signs of rust or significant corrosion — disturbing these connections can trigger a larger pipe failure.
- The kitchen plumbing includes non-standard configurations such as PEX manifold systems with specialized fittings that require specific tools or knowledge to disconnect safely.
According to HomeAdvisor, the average cost for a plumber to remove and replace a kitchen faucet ranges from $150 to $350 depending on the complexity of the job and local labor rates. If the situation involves replacing deteriorated shut-off valves at the same time, the cost typically rises to $200 to $500. (Source: HomeAdvisor Cost Guide, 2023.)
What to Do After the Old Faucet Is Out
Once the old spigot and faucet assembly is removed and the sink deck is cleaned, a few additional steps prepare the area for the new installation:
- Inspect the shut-off valves — test each one by opening and closing it. If either valve drips at the packing nut or doesn't close fully, replace it now before installing the new faucet. Replacing a valve with the water supply already shut off is much easier than doing it later.
- Measure the sink holes — before purchasing a new faucet, confirm the number of holes (1, 2, or 3) and their diameter. Standard faucet holes in kitchen sinks are 1-3/8 inches (35mm) in diameter. Some premium sinks have 1-5/8 inch holes.
- Check the counter or sink deck thickness — the shank length on your new faucet must be compatible with the thickness of your sink deck or countertop. Most faucets accommodate decks up to 2-1/2 inches thick, but thick stone or solid surface counters may require extended shanks or an accessory adapter.
- Purchase new supply lines — even if the old supply lines look fine, replacing them during a faucet change is inexpensive and eliminates a potential failure point. Standard braided stainless steel supply lines cost $8 to $15 each and are sold in lengths from 12 to 24 inches.
- Read the new faucet installation instructions before beginning — faucet designs vary significantly between manufacturers and models. Some require the supply lines and spray hose to be fed through the sink hole before the faucet body is lowered into place; others assemble from beneath. Following the sequence in the manual prevents having to backtrack during installation.
Frequently Asked Questions About Removing a Kitchen Faucet
How long does it take to remove a kitchen faucet?
For a straightforward single-handle faucet with accessible connections and functioning shut-off valves, the removal takes 20 to 45 minutes. If the mounting nut is corroded and requires penetrating lubricant treatment plus waiting time, the job can extend to 90 minutes or more. Adding in disconnecting a side sprayer spigot typically adds another 10 to 20 minutes.
Do I need to shut off the main water supply to replace a kitchen faucet?
In most cases, no. Individual shut-off valves under the sink allow you to stop water flow only to the faucet without affecting the rest of the house. Main water shut-off is only necessary if the under-sink valves are absent, broken, or don't close completely.
What is the difference between a faucet and a spigot in the kitchen context?
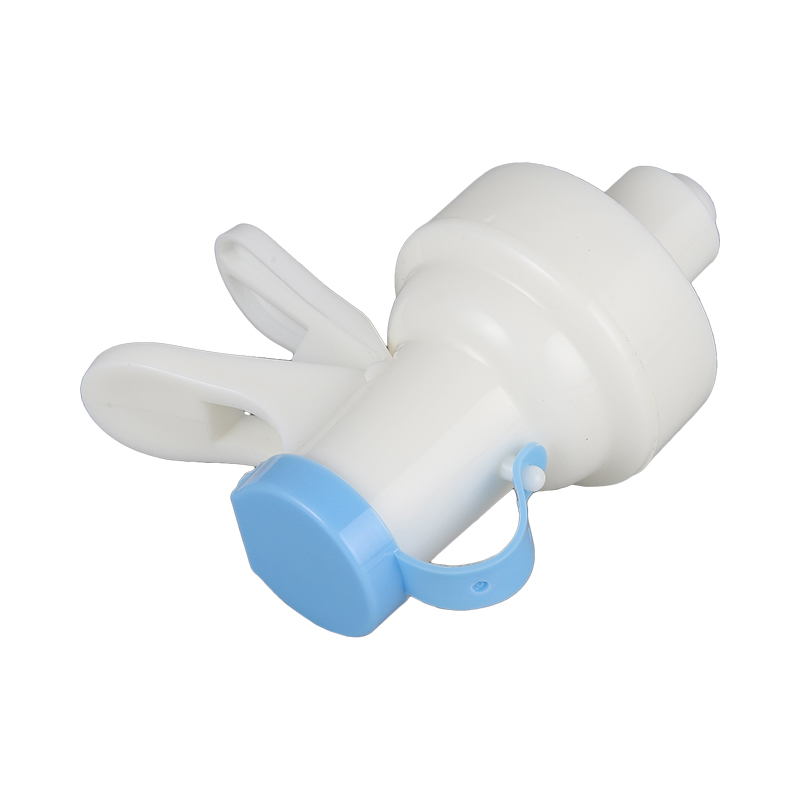
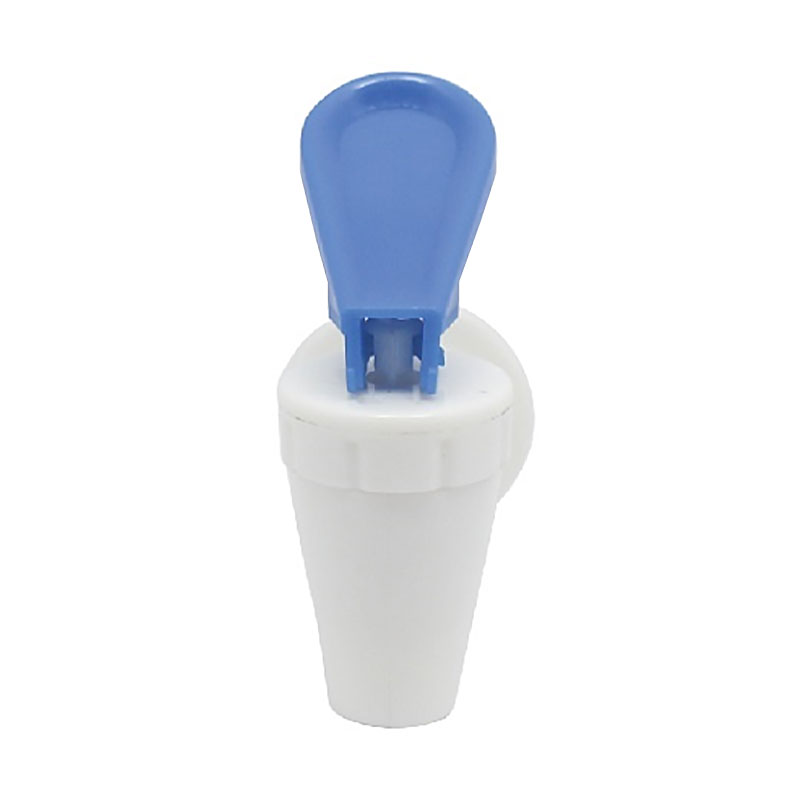
In plumbing terminology, a spigot and a faucet both refer to a valve or fixture that controls water flow, but in modern usage, "faucet" typically refers to the indoor fixture at the sink, while "spigot" more commonly refers to an outdoor hose bib or a simple tap. However, in casual usage, the terms are often interchangeable. A kitchen faucet may include a small secondary spigot (the side sprayer) as a separate component. Removing either the main spigot or the side sprayer follows the principles outlined in this guide.
Can I remove a kitchen faucet without a basin wrench?
Technically yes, but it's significantly harder. Without a basin wrench, you'd need to access the mounting nut with a standard open-end wrench, which requires much more swing clearance than is usually available under a kitchen sink. Some resourceful DIYers use a long-handled socket extension with a nut socket, but this approach works only on hexagonal nuts of a specific size. A basin wrench is inexpensive (under $25) and makes the job dramatically faster — it's worth purchasing.
My shut-off valve is stuck and won't turn — what do I do?
A shut-off valve that hasn't been operated in years often seizes in the open position due to mineral deposits on the stem. Apply penetrating lubricant to the packing nut area, let it sit, then try again with firm (not excessive) torque. If the valve's handle breaks off or the valve still won't close, shut off the main water supply and replace the valve entirely. Angle stop valves cost $8 to $20 each and are straightforward to replace when the main water is off.
How do I remove a kitchen faucet if there is no access under the sink?
In rare cases — such as in kitchens with base cabinets that have no under-sink access panel — you may need to approach from above. Some faucets, particularly deck-mounted spigots on farmhouse-style sinks, allow topside access to their mounting hardware. Otherwise, consult a plumber who can assess whether access panels can be added, or whether the faucet can be freed from a different angle.
Is it possible to remove a kitchen faucet without draining the pipes first?
Technically you can loosen and remove the faucet while the supply lines still hold water, but this causes a significant water release inside the cabinet when the supply line connections break. Always open the faucet to relieve pressure first and keep a bucket ready. The amount of water released is typically small — a cup or less — but it can create a mess and potentially damage cabinet flooring if not anticipated.
What should I do if the supply line connection is leaking after I reinstall the valves?
A small drip at a supply line connection after reassembly is usually a matter of the coupling nut needing an additional quarter-turn. Tighten gradually and check after each incremental tightening. Do not over-tighten, particularly on plastic nuts or older brass compression fittings, as this can crack the nut or damage the valve seat. If a persistent leak continues, the supply line itself may be faulty — replacement is the correct solution in that case.
Can I reuse the supply lines from my old faucet?
If the supply lines are less than 5 years old, made of braided stainless steel, and show no signs of corrosion, kinking, or cracking at the ferrules, reusing them is acceptable. However, given that supply lines are inexpensive and a failed line can cause significant water damage, most plumbers recommend replacing them during any faucet change. The peace of mind is worth the $10 to $30 investment in new lines.
How do I know what size replacement faucet to buy after removing the old one?
After removing the old faucet, measure the sink hole diameter and count the number of holes in the sink deck. Standard kitchen sink holes are 1-3/8 inches in diameter. If your sink has three holes spaced 8 inches apart, you can install a widespread faucet or a single-handle faucet with a deck plate. If it has one center hole, choose a single-hole faucet. If it has two holes (less common), look for a two-hole faucet design or a single-handle model that covers the second hole with its base.
 water usb pump /Electric Drinking Water Pump with Rechargeable Battery")


