English
 русский
 日本語
日本語 عربى
عربى Español
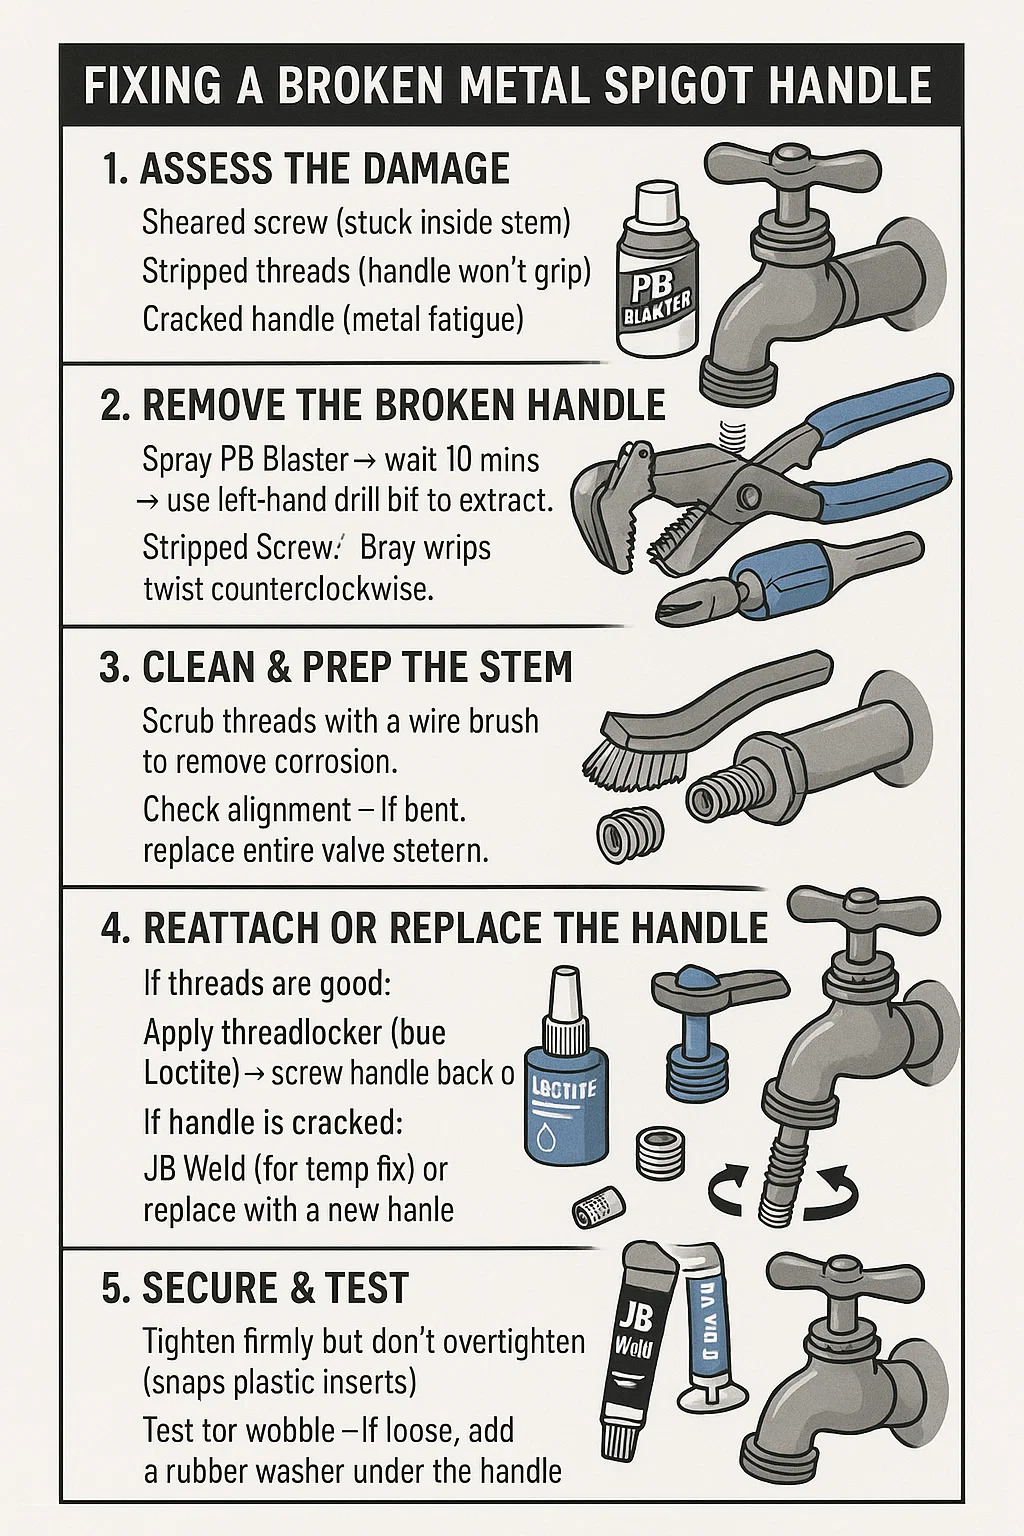
Fixing a Broken Metal Spigot Handle
1. Assess the Damage
Type of Break:
Sheared screw (stuck inside stem)
Stripped threads (handle won’t grip)
Cracked handle (metal fatigue)
2. Remove the Broken Handle
Stuck Screw? Spray PB Blaster → wait 10 mins → use left-hand drill bit to extract.
Stripped Screw? Grip with vise-grips and twist counterclockwise.
3. Clean & Prep the Stem
Scrub threads with a wire brush to remove corrosion.
Check alignment – If bent, replace the entire valve stem.
4. Reattach or Replace the Handle
If threads are good:
Apply threadlocker (blue Loctite) → screw handle back on.
If threads are stripped:
Tap new threads (use a M6 x 1.0 tap for most spigots).
Use a repair sleeve (thread insert like Heli-Coil).
If handle is cracked:
JB Weld (for temp fix) or replace with a new handle.
5. Secure & Test
Tighten firmly but don’t overtighten (snaps plastic inserts).
Test for wobble – If loose, add a rubber washer under the handle.
| Step | Action | Tool/Material | Pro Tip |
| Damage Assessment | Identify break type (sheared screw/stripped threads/cracked handle) | Flashlight, magnifier | Shine light at 45° angle to reveal hairline cracks |
| Removal | For stuck screws: Penetrating oil + left-hand drill bit extraction | PB Blaster, extractor set | Heat with lighter first if plastic components present |
| Thread Repair | Clean with brass brush, re-tap if stripped | Thread chaser set, wire brush | Always cut new threads clockwise to match original |
| Handle Reattachment | Use threadlocker for intact threads | Blue Loctite #243 | Let cure 1 hour before use - sets faster with metal |
| Replacement Options | For cracked handles: epoxy temp fix or full replacement | JB Weld, replacement handle kit | Keep original handle brand for perfect fit |