
 English
 русский
 日本語
日本語 عربى
عربى Español
Content
- 1 What Are Faucet Pipes and How Do They Connect to a Spigot?
- 2 Pipe Materials Used in Faucet and Spigot Supply Lines
- 3 Anatomy of a Spigot: Every Component and Its Role
- 4 Sizing Faucet Pipes and Spigot Supply Lines Correctly
- 5 Installing Faucet Supply Pipes and a Spigot: Step-by-Step Process
- 6 Troubleshooting Faucet Pipes and Spigot Problems
- 7 Maintenance Schedule for Faucet Pipes and Outdoor Spigots
- 8 How to Choose the Right Spigot for Your Faucet Pipe Setup
- 9 Water Efficiency Considerations for Faucet Pipes and Spigot Systems
What Are Faucet Pipes and How Do They Connect to a Spigot?
Faucet pipes are the supply lines, valves, and connectors that deliver pressurized water from a main supply to a fixture outlet — whether that fixture is an indoor kitchen tap or an outdoor spigot. The single most important distinction homeowners miss: a faucet and a spigot are not the same fitting, even though both terminate a supply run. A faucet refers to any valve-controlled outlet for dispensing water indoors; a spigot (also called a hose bib or sillcock) is specifically the threaded exterior or utility outlet designed to accept a garden hose coupling. Understanding the pipe system behind both prevents mismatched fittings, pressure drops, and costly leaks.
In residential plumbing, faucet supply pipes are typically 3/8-inch or 1/2-inch nominal diameter flexible braided connectors at the fixture end, fed from 1/2-inch or 3/4-inch rigid copper, CPVC, or PEX runs in the wall. Spigot supply lines share those same rough-in diameters but often require a dedicated shutoff — especially in freeze-prone climates — before the water reaches the exterior threaded outlet. Every run of faucet pipe, from the meter to the spigot, involves the same core components: pipe material, fittings, shutoff valves, and connection hardware. Getting each one right determines flow rate, longevity, and water-tightness.
Pipe Materials Used in Faucet and Spigot Supply Lines
Not every pipe material performs equally behind a faucet or spigot. The four dominant materials in modern plumbing each carry distinct trade-offs in cost, installation ease, corrosion resistance, and pressure handling.
Copper
Copper has been the standard for faucet supply lines since the mid-20th century. Type L copper (wall thickness 0.060 inch in 1/2-inch nominal) handles household pressures of 60–80 psi without issue and resists most biological growth inside the pipe. Soldering copper joints requires flux, a torch, and experience, but the resulting connection is near-permanent. Copper faucet pipes typically last 50–70 years in neutral-pH water, according to the Copper Development Association. The main downsides are cost — copper traded above $4 per pound in 2023 — and susceptibility to pinhole corrosion in acidic water with pH below 6.5.
PEX (Cross-Linked Polyethylene)
PEX has overtaken copper in new residential construction due to its flexibility, freeze resistance, and speed of installation. A 100-foot coil of 1/2-inch PEX costs roughly $30–$45 versus $90–$120 for the same length of Type L copper. PEX faucet supply runs use either crimp rings, clamp rings, or expansion fittings; no torch work required. PEX can expand up to 8 times before rupturing under freeze conditions, making it the preferred pipe material for spigot supply lines in USDA hardiness zones 4 and colder. It is not UV-stable and must be kept out of direct sunlight in exposed runs.
CPVC (Chlorinated Polyvinyl Chloride)
CPVC handles hot and cold faucet supply runs at temperatures up to 200°F — well above PEX's 180°F rating. It solvent-welds with a purple primer and CPVC cement, creating joints that cure in as little as 15 minutes. Pipe costs are lower than copper but higher than PEX, and CPVC becomes brittle with age in cold climates, which can be a concern for spigot supply lines that pass through unheated crawl spaces.
Braided Stainless Steel Flexible Connectors
These short connectors (typically 12–24 inches) link the rigid supply stub-out to the faucet inlet. They are not full-run pipe; they are the final transition. A burst braided supply line is one of the top five sources of indoor water damage in the United States, per insurance industry data. Replace rubber-core braided lines every 5–7 years; stainless-mesh-over-stainless-core versions last considerably longer and are worth the modest price premium.
| Material | Max Temp | Typical Lifespan | Relative Cost (1/2" per ft) | Best Use |
|---|---|---|---|---|
| Copper (Type L) | 250°F | 50–70 years | High (~$2.50–$4/ft) | Indoor hot/cold runs |
| PEX-A | 180°F | 40–50 years | Low ($0.30–$0.50/ft) | Freeze-zone spigot lines |
| CPVC | 200°F | 25–40 years | Medium ($0.80–$1.20/ft) | Hot supply in warm climates |
| Braided SS Flex | 180°F | 5–10 years (rubber core) | Low per unit ($5–$15) | Faucet final connection |
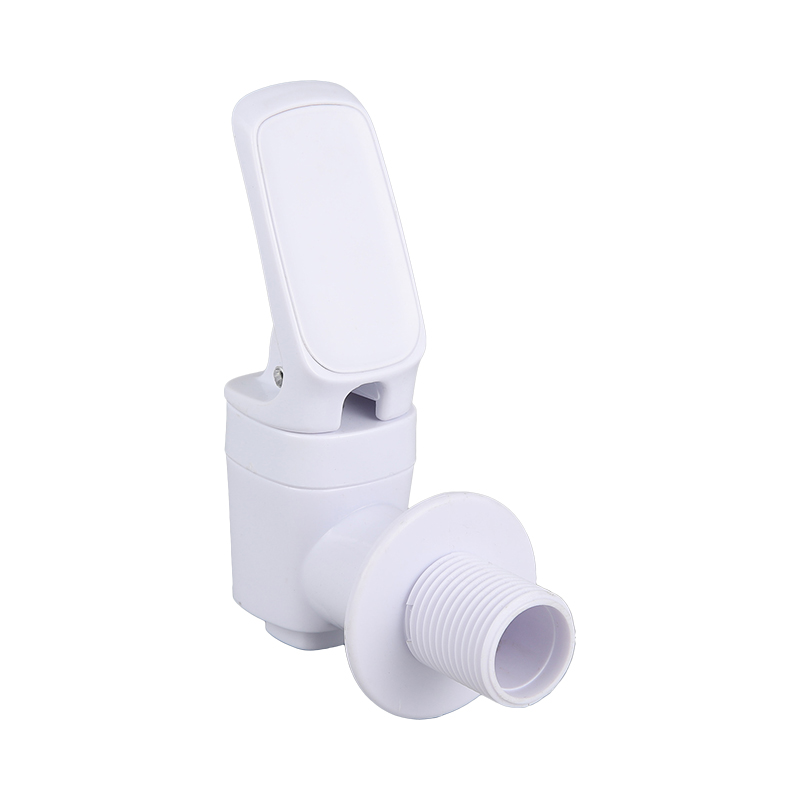
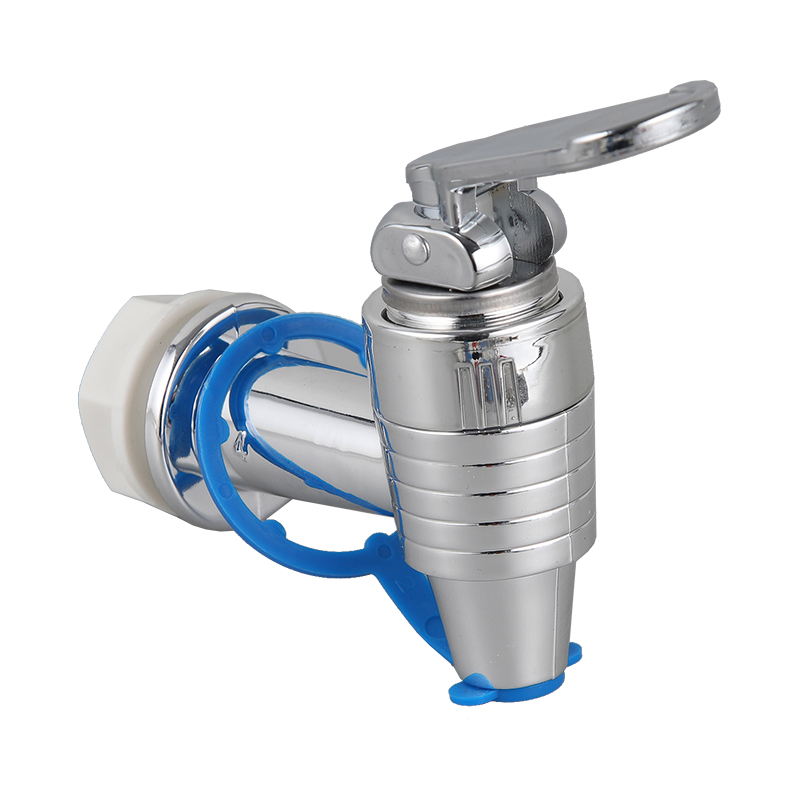
Anatomy of a Spigot: Every Component and Its Role
A spigot is deceptively simple at first glance — a handle, a body, a threaded outlet — but each component plays a specific role in controlling flow, preventing backflow, and surviving seasonal temperature swings. Understanding the anatomy helps when selecting replacement parts or diagnosing a drip.
The Valve Body
The body is the main casting — typically brass in quality spigots, though zinc alloy (pot metal) bodies appear in budget fixtures. Brass bodies tolerate higher pressures, resist dezincification corrosion, and hold thread integrity through repeated hose coupling cycles. A brass spigot body weighs roughly 12–18 oz for a 3/4-inch hose bib; a zinc body of the same apparent size will be noticeably lighter. The body houses the stem, packing, and seat — all of which wear independently.
The Stem and Seat
Turning the handle rotates or translates the stem so that a rubber washer or cartridge presses against the seat to stop flow. In compression spigots (the most common traditional type), the rubber washer is held by a brass screw at the stem tip. When a spigot drips from the outlet with the handle fully closed, the washer or seat is worn. Replacement washers cost under $1 and the repair takes under 20 minutes — making this one of the most cost-effective plumbing fixes available.
The Packing Nut and Packing
Packing prevents water from leaking around the stem where it exits the body. In older spigots, graphite-impregnated string packing wraps around the stem under the packing nut. Modern spigots use O-rings. A leak at the handle — not the outlet — almost always means the packing needs replacement or the packing nut needs a quarter-turn tightening. Overtightening makes the handle hard to turn and accelerates stem wear; the nut should be snug, not locked.
The Vacuum Breaker (Anti-Siphon Device)
Outdoor spigots in jurisdictions with modern plumbing codes incorporate a vacuum breaker at the outlet, either as a cap-style add-on or built into the body. The vacuum breaker prevents backflow — contaminated water from a hose submerged in a bucket cannot siphon backward into the supply line when pressure drops. Anti-siphon spigots are required by the International Plumbing Code (IPC) Section 608 for all hose connections. The device contains a small rubber disc that opens under positive pressure and seats under negative pressure; it can stick open and drip, in which case replacement costs $3–$8 for the cap assembly.
Freeze-Proof (Sillcock) Design
A standard spigot seats its washer right at the exterior wall — which means standing water behind the washer can freeze and burst the body in winter. A frost-free sillcock extends the stem 8–12 inches (or more) into the heated interior of the building, placing the seat and washer where temperatures stay above freezing. The stem length of a frost-free sillcock must match the wall thickness; a 4-inch stem in a 6-inch wall leaves 2 inches of pipe exposed to cold, defeating the purpose. Standard sizes run 4, 6, 8, 10, and 12 inches; custom lengths are available from specialty suppliers.
Sizing Faucet Pipes and Spigot Supply Lines Correctly
Undersized pipe is the most common cause of weak flow at a faucet or spigot. Flow rate drops dramatically when pipe diameter is reduced — cutting a 3/4-inch supply down to 1/2-inch more than halves available flow capacity in many residential configurations. Correct sizing starts with two numbers: static pressure at the meter and the total equivalent length (TEL) of the pipe run.
Pressure and Flow Fundamentals
Municipal supply pressure in the United States typically runs 45–80 psi at the meter. If your static pressure exceeds 80 psi, a pressure-reducing valve (PRV) is needed — sustained high pressure accelerates wear on faucet cartridges, braided connectors, and the spigot packing. Every foot of pipe, every elbow, and every tee adds friction loss that reduces pressure at the fixture. Plumbers express this friction as equivalent feet of straight pipe — a 1/2-inch 90-degree elbow is equivalent to about 1.5 feet of straight pipe in friction loss terms.
Recommended Supply Pipe Diameters by Fixture
- Kitchen faucet (single-family): 1/2-inch nominal supply, 3/8-inch flexible connector at the faucet
- Bathroom lavatory faucet: 1/2-inch nominal supply, 3/8-inch flexible connector
- Outdoor spigot / hose bib: 3/4-inch nominal supply strongly preferred if the run exceeds 20 feet
- Garden spigot serving irrigation: 3/4-inch dedicated branch off the main, not teed off a 1/2-inch faucet supply
- Commercial or multi-family: consult fixture unit calculations per IAPMO Uniform Plumbing Code Appendix A
A 3/4-inch pipe carries roughly 2.5 times the flow volume of a 1/2-inch pipe at the same pressure. If your spigot feeds a drip irrigation zone, soaker hoses, or a pressure washer, supplying it through a 3/4-inch dedicated branch is the single highest-value sizing decision you can make.
Total Equivalent Length Calculation
To size a faucet pipe run properly, add the measured pipe length to the equivalent lengths for all fittings. A rough estimate for a typical residential kitchen faucet supply (10 feet of 1/2-inch copper, two 90-degree elbows, one tee, one shutoff valve) works out to approximately 17–18 feet TEL. Cross that against an available pressure-drop chart for the pipe material and diameter to confirm flow rate meets the minimum — 2.2 gpm for a kitchen faucet, per EPA WaterSense standards. For outdoor spigots used with a pressure washer drawing 1.5–2.5 gpm at 40+ psi working pressure, the supply pipe must deliver that flow with pressure remaining after friction losses.
Installing Faucet Supply Pipes and a Spigot: Step-by-Step Process
A faucet or spigot installation follows a logical sequence: shut off supply, prepare the pipe run, mount the fixture, make connections, test. Skipping steps — particularly pressure-testing before closing walls — is the source of most callbacks in residential plumbing work.
- Shut off the main water supply and open the lowest faucet in the house to drain the lines.
- Mark the spigot or faucet location and drill through the wall or cabinet if required — 1-3/8-inch hole saw for most spigot bodies.
- Run the supply pipe from the branch tee or existing stub-out to the fixture location, cutting pipe cleanly and deburring the ends.
- Install a dedicated shutoff valve within accessible reach of each faucet and each spigot supply line.
- Solder, crimp, expand, or solvent-weld joints per the pipe material — copper requires flux and lead-free solder; PEX requires proper tool calibration.
- For an outdoor spigot, caulk the flange to the exterior wall with exterior-grade silicone to prevent water infiltration behind the body.
- Connect flexible supply lines to faucet inlets hand-tight plus 1/4 turn with a wrench — not more, as overtightening cracks the plastic nuts on compression fittings.
- Restore water pressure slowly and check every joint for seepage before closing access panels or drywall.
- Open the faucet or spigot fully to purge air, then test flow rate and check for drips at the supply connection, packing nut, and outlet.
Common Installation Mistakes and How to Avoid Them
- Using the wrong thread sealant: PTFE tape works on tapered NPT threads but not on straight (NPS) threads, which require pipe dope or an anaerobic sealant.
- Not supporting flexible supply lines: unsupported lines vibrate under water hammer and eventually fatigue at the crimp fitting.
- Choosing a frost-free spigot stem that is too short for the wall — measure wall depth from interior face to exterior sheathing, not just drywall thickness.
- Leaving a hose attached to a frost-free spigot in winter: even frost-free sillcocks freeze if a hose traps water behind the outlet. Remove hoses before first frost.
- Mixing dissimilar metals without a dielectric union — copper pipe connected directly to a galvanized steel fitting will corrode at the joint through galvanic action within a few years.
Troubleshooting Faucet Pipes and Spigot Problems
Most faucet and spigot problems fall into four categories: dripping, weak flow, leaking at a connection point, or frozen / burst pipe. Each has a specific diagnostic path.
Dripping Outlet with Handle Fully Closed
On a compression spigot or faucet, this means the seat washer is worn or the brass seat itself is damaged. Replace the washer first (under $1); if dripping continues after washer replacement, the seat needs resurfacing with a seat wrench and seat grinder or outright replacement. A dripping spigot wastes approximately 3,000–5,000 gallons of water per year at one drip per second, per EPA estimates — fixing it is not merely cosmetic.
Leak at the Supply Connection or Packing
A leak at the threaded connection where the spigot body meets the supply pipe almost always means insufficient or incorrect thread sealant, or a cracked fitting. Remove, clean threads thoroughly, apply PTFE tape (three wraps minimum on tapered NPT) or pipe dope, and reinstall. A leak at the packing nut means tightening the nut 1/8 turn first; if that fails, replace the O-ring or packing string.
Low Flow at the Faucet or Spigot
Isolate the cause by testing pressure at the shutoff valve with a pressure gauge adapter — gauges thread onto hose bib outlets and cost under $15. If static pressure is adequate (above 45 psi) but flow is weak, the aerator on a faucet is likely clogged with mineral scale. Remove and soak in white vinegar for 30 minutes. For a spigot with no aerator, check whether the anti-siphon vacuum breaker has failed in the closed position — a stuck breaker disc restricts flow significantly.
Burst or Split Pipe After a Freeze
A burst faucet pipe is identifiable by a loud pop during the freeze event and obvious water discharge or staining when pressure is restored. Copper splits along a longitudinal seam; PEX typically stretches enough to survive single freeze events but may split at fittings. The repair requires cutting out the damaged section and installing a coupling — push-to-connect SharkBite-style fittings work on both copper and PEX and require no soldering or crimping tools, making emergency repairs feasible without specialized equipment. After repair, insulate exposed spigot supply lines with closed-cell foam pipe insulation rated for the local design temperature.
Maintenance Schedule for Faucet Pipes and Outdoor Spigots
Proactive maintenance on faucet supply lines and spigots costs almost nothing and prevents the water damage events that cost homeowners an average of $11,098 per claim, according to the Insurance Information Institute (2023 figures). The maintenance tasks are simple and require only basic tools.
Annual Tasks
- Inspect all braided flexible supply lines under sinks and behind toilets for corrosion, kinking, or bulging at the end fittings — replace any line showing these signs immediately.
- Exercise every shutoff valve (quarter-turn fully open, then back to operating position) to prevent mineral buildup from seizing the valve in the open position.
- Check the exterior caulk bead around each spigot flange and reapply if cracked or missing.
- Clean faucet aerators in high mineral-content water areas (above 180 ppm total dissolved solids).
Seasonal Tasks (Pre-Winter)
- Shut off the interior isolation valve for each outdoor spigot and open the spigot handle to drain remaining water from the pipe beyond the seat.
- Disconnect all garden hoses — a hose traps water in the spigot body even on a frost-free sillcock.
- Fit an insulated faucet cover over exposed spigot bodies for any period where temperatures drop below 28°F for more than four hours, per FEMA cold-weather guidance.
Every 5–7 Years
- Replace rubber-core braided supply lines regardless of appearance — rubber degrades internally before exterior signs appear.
- Replace the vacuum breaker cap on outdoor spigots if the device shows any signs of dripping in the closed position.
- Inspect accessible copper or CPVC faucet pipes for discoloration, green patina, or mineral deposits at joints that might indicate a slow weep.

Water Efficiency Considerations for Faucet Pipes and Spigot Systems
Faucet pipes and spigots are often overlooked in water efficiency conversations dominated by showerheads and toilets, but the outdoor spigot in particular is one of the largest single water draw points in a residential property. Outdoor water use accounts for approximately 30% of total household water consumption in the US, and up to 60% in drier western states, according to the EPA WaterSense program.
Pressure-Compensating Aerators
Indoor faucets reduce flow waste through aerators — mesh screens that introduce air into the water stream, maintaining the perception of good flow while limiting actual throughput. EPA WaterSense-labeled kitchen faucets flow at a maximum 1.8 gpm (down from the old 2.2 gpm standard). Retrofitting an older 2.5 gpm kitchen faucet aerator with a 1.5 gpm model saves approximately 700 gallons per year for an average household at no performance cost to the user.
Timer-Controlled Spigot Valves
Battery-operated hose timer valves thread directly onto a spigot outlet and allow programmed watering cycles. A properly programmed drip irrigation system supplied through a spigot uses 30–50% less water than equivalent overhead sprinkler coverage, per California Department of Water Resources data. The investment in a quality timer (typically $25–$60) pays back in reduced water bills within one growing season in most municipalities.
Detecting Hidden Losses in Faucet Supply Pipes
A pinhole leak in a copper faucet supply pipe inside a wall can go undetected for months, releasing hundreds of gallons. The simplest detection method: read your water meter, shut off all fixtures and spigots for two hours, then read the meter again. Any movement in the reading indicates a leak somewhere in the system. Narrowing down the location requires shutting off supply branches in sequence. Smart water monitors that clamp onto the main supply line (such as devices from Flo by Moen or Phyn) automate this detection and can shut off supply automatically when anomalous flow is detected.


