English
 русский
 日本語
日本語 عربى
عربى Español
Here's a step-by-step guide for installing a metal spigot on a turkey fryer:
Core Tools & Materials
Metal spigot: Bronze or stainless steel (zinc alloys melt at frying temps)
Step drill bit (for clean hole in thin metal)
Teflon tape + high-temp pipe dope
Adjustable wrench + channel locks
Center punch + safety goggles
Installation Process
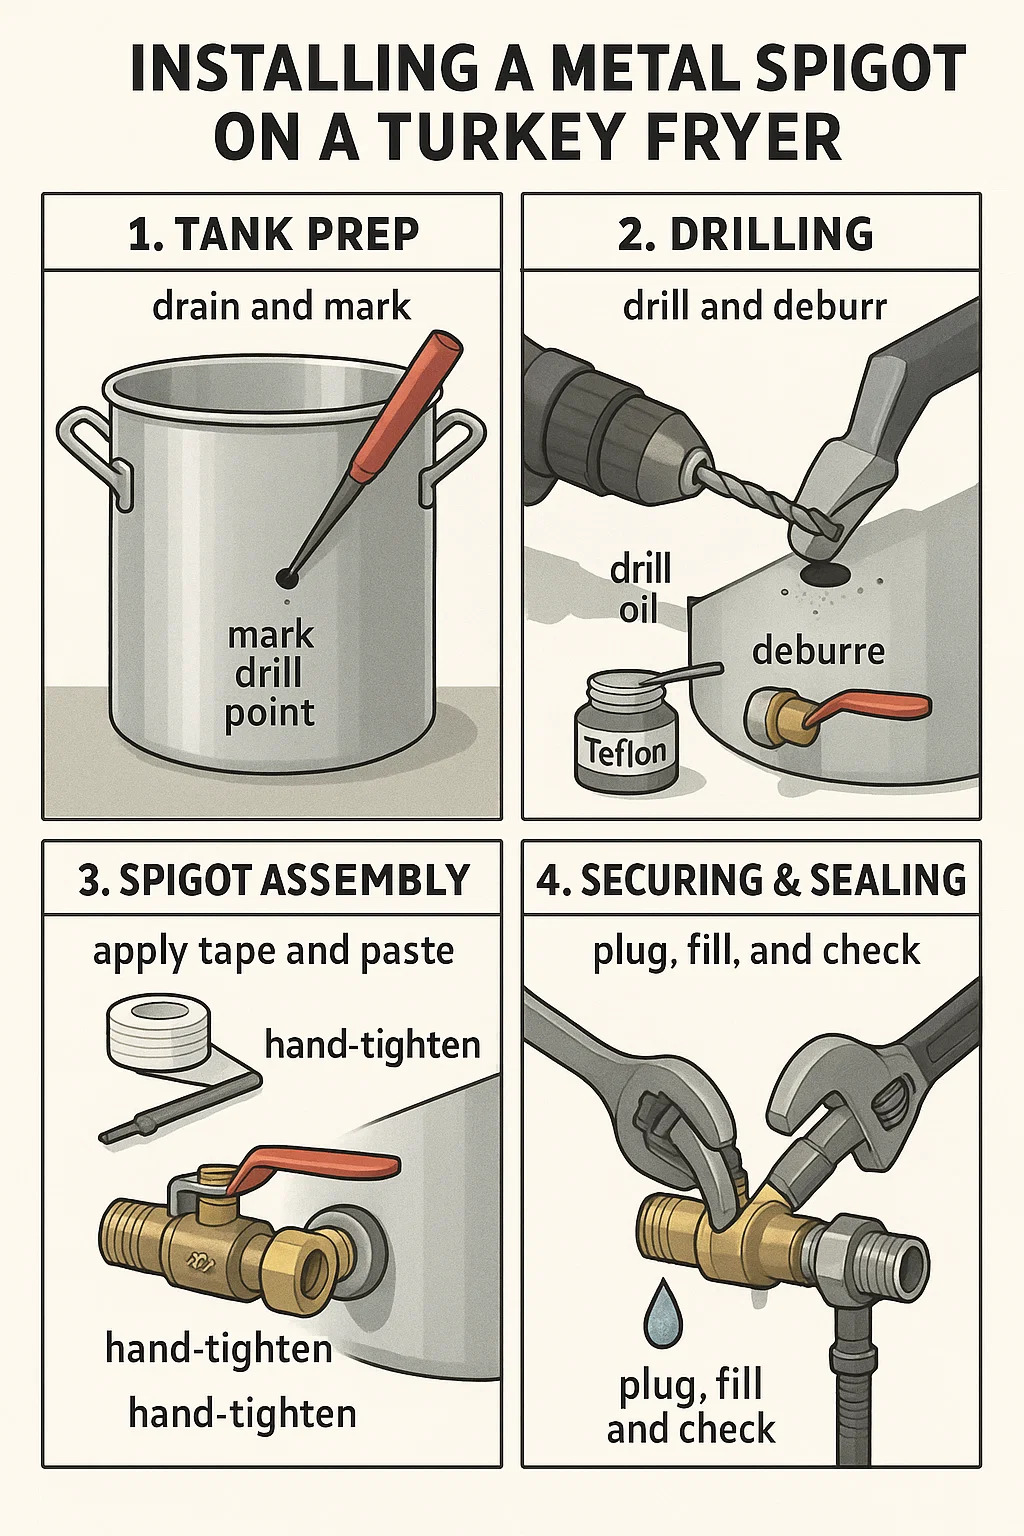
1. Tank Prep
Drain residual oil completely – wipe interior with rags until dry
Mark drill point:
Ideal position: 1" above fryer’s lowest curve (avoids sediment clogs)
Avoid weld seams (weak points) – tap tank to find “drum” sound areas
2. Drilling
Punch starter dimple to prevent bit walking
Lubricate drill bit with cutting oil (reduces burrs)
Slow-speed drilling: Start with ¼" bit → step up to spigot size (e.g., ⅜" NPT)
Deburr hole: Use round file on both sides – removes sharp edges that crack seals
3. Spigot Assembly
Wrap male threads:
3 clockwise turns of Teflon tape (facing thread direction)
Coat with nickel-based anti-seize paste (seals >500°F)
Hand-tighten spigot into tank until seated – DO NOT CRANK
4. Securing & Sealing
Backup wrench inside: Hold spigot base with channel locks inside tank
External tightening: Use adjustable wrench – ¼ turn past hand-tight (soft metal threads strip easily)
Seal test: Plug spigot → fill tank with water → check for weeping at threads
Critical Warnings
Meltdown risk: Plastic valves will FAIL – use full-metal ball valves only
Thermal expansion gap: Leave ⅛" clearance between handle and tank (prevents binding when hot)
Oil drainage safety:
Install downward-angled extension pipe (directs oil away from feet)
Never drain >300°F oil – spigot heat softens seals